Showing posts with label Stencils. Show all posts

Tuesday, April 2, 2013

Journal Covers-a-Go-Go

In a previous post, I chronicled my exploits cutting stencils, fairly complicated, fiddly stencils. Whenever I start doing a project, I tend to go for the most complicated thing possible to start, then I work my way to the easy stuff.  True to form, I did that with stencils. The easiest stencils you can made are the ones where you take a strip of thin cardboard from some packaging, fold it in half, and cut shapes in it. Well, maybe even cheaper is to take those same strips of cardboard and punch holes out of it with a paper punch. To do that, you need to make sure your cardboard, or whatever you use, is not too thick. Here is a sampling of the ones I made:


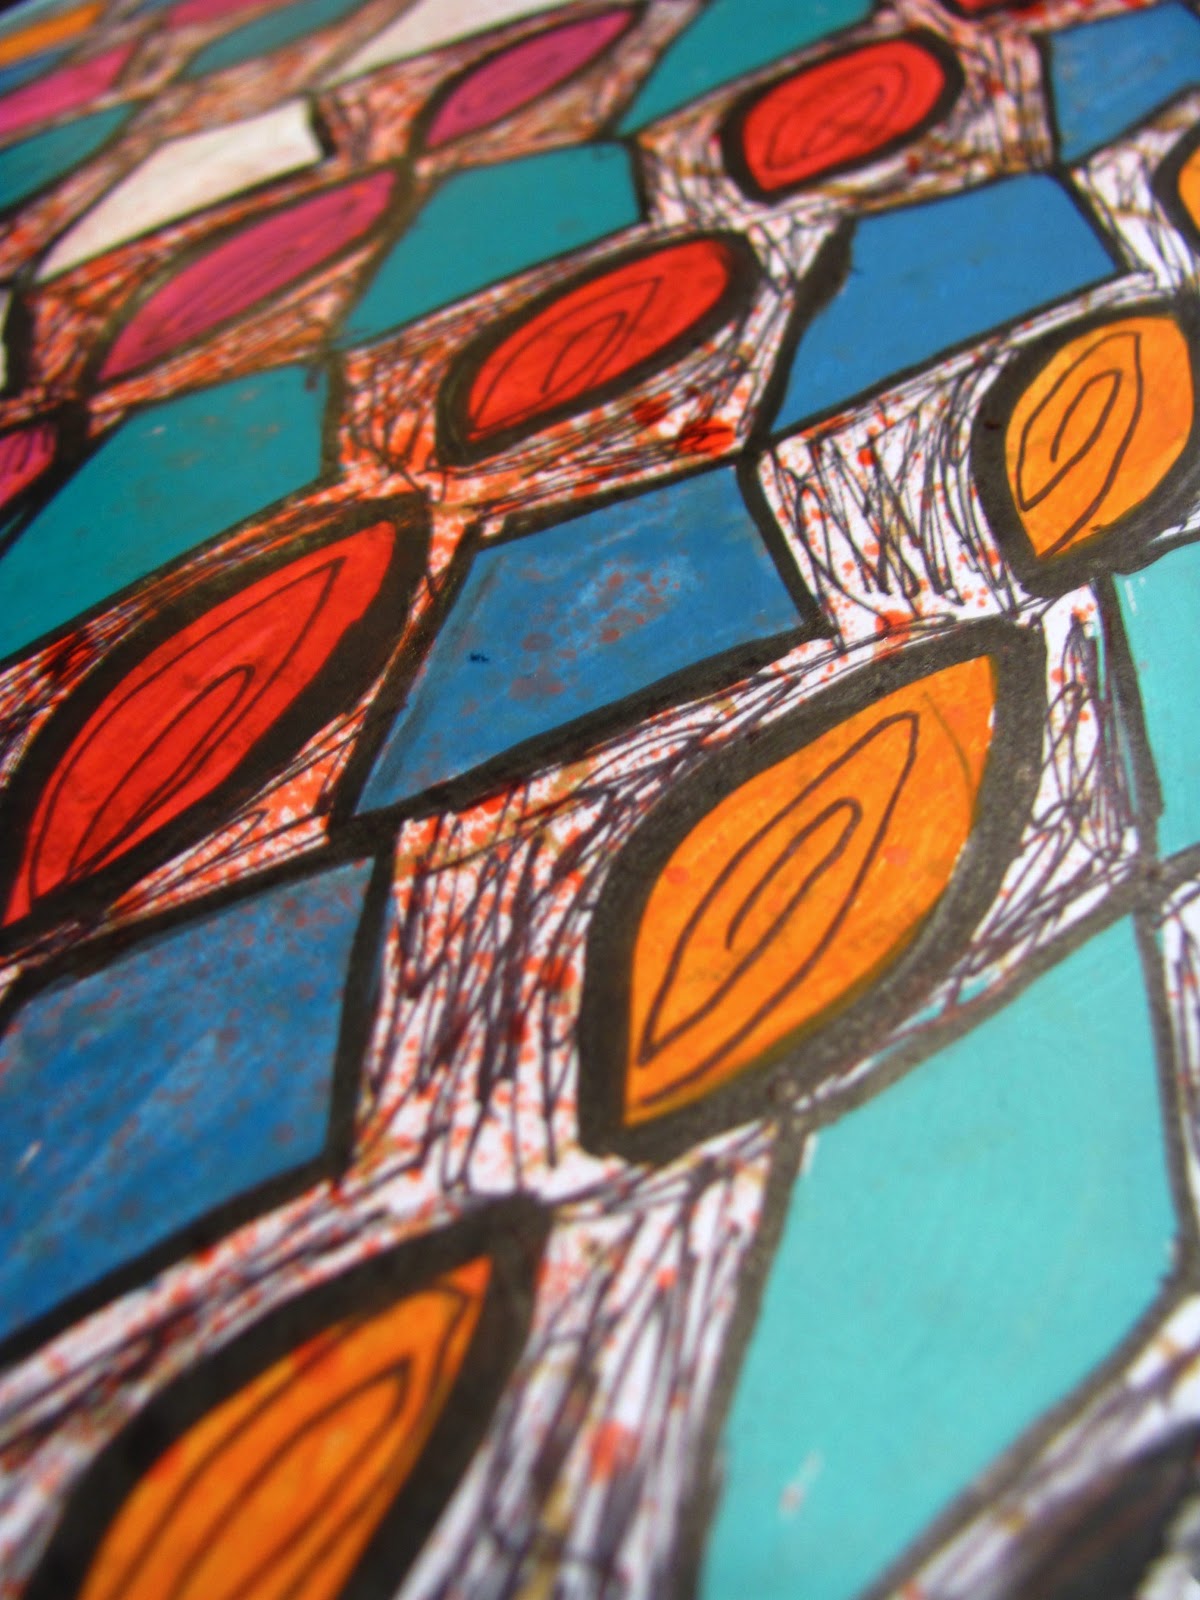
I used these stencils in a couple of different ways to create two very different, distinctive journal covers. For the first, I traced the designs down the page, painted them with craft paint, then did outlining and marking with technical pens.


I like that it looks like a woodcut from the 1950s or '60s.
Looks even better close up!
The other way I used the stencils was to just go crazy with a few colors of paint and a makeup wedge. I just pounced and pounced until I felt I was done, and then I pounced a little bit more. Then, I took a stencil I hadn't been using (the stars) and colored in the shapes with a white gelly roll pen. I almost forgot, I traced the circles in Inktense Pencils to try to give more contrast. I am not sure it was that successful, but it doesn't really take anything away from the page.


I am finding these stencils of simple shapes very versatile. There will definitely be more to come in the future. They can be used in an overall design, as an accent, or as texture. They can be used with paint, pencils, markers, dabbers, sponges, pastels, or anything else you have laying around. Ad the best thing about it is that you are using materials that are readily available, no extra purchases necessary. And don't forget you are recycling!

One more cover to add, but this was done freehand.

Yes, this was done on materials I received from the doctor before my sinus surgery. If you have any kind of paper, you have a journal surface!

Friday, February 1, 2013

New stencils and stuff!

At long last, my order from Joanne's came in. It felt like I was getting so much more than I actually got, or maybe that is the memory of how much I spent. Since, my studio section of my studio apartment is still in disarray. I am not the most active organizer. I tend to do it in small bursts. That means there is still no work surface, so I cleaned off my tv tray and had a go with some of my new supplies.

First, I have to say the Crafters Workshop templates were AWESOME! I started out with the 6"x6" size, since it seemed to make more sense to me right now. The bigger ones will follow eventually, they are that awesome. I am trying to figure out the angel policy thing. When it says you are allowed to create "x" number of images for sale, do they mean the number of times one can use a given template/stamp in any original piece of art you use that product in, or does it only refer to when you make the same thing several times. For example, an original design can be recreated a number of times when someone makes greeting cards. Is that what they mean? It makes as much sense to me as the last couple of questions probably did to you. I figure I ought to get the copyright/fair use thing straight before I make something and try to sell it. I am not looking to be hassled.

I also got a few daubers of distress inks, a few stamps, and a few containers of acrylic ink. The distress inks were very nice. I stamped with the walnut stain color. I frankly used as much as I thought I could get away with on one page. Somehow it seems to work. It is a beautiful mess. The most interesting thing on the page, however, wasn't one of the many new supplies. It was the set of homemade stamps I made. I have had a couple of keyboards bite the dust. With my computer/tv set up, it gets knocked down a lot, so tings happen. I tend to get the cheapest Apple keyboards I can find, which are reasonable. When I inevitably kill them, I take them apart for parts. Not to build a new franken-keyboard, but to eventually use in an art project. This is the first time I followed through. The frame for the keys is a big grid of Xes. I thought it would be cool to use configurations of them to stamp with, so I cut that bit apart and pulled out a couple of shapes that appealed to me, and glued them to some cheap Dollar Tree crafts sheets and cardboard. They worked beautifully. I also have a single one waiting to be mounted, and the rest of the part can be taken apart and mounted as well, melting down the Xes a little so they have wider edges. But I am not feeling ambitious enough to do that quite yet. I already have the mess of organizing supplies, making the art journal from paper bags, and backing up all my hard copy dvds to deal with. I figure I have enough to chew on for right now. 

My experimental art journal page. This is what happens when I test my new stuff out. My new letter stamps, the crackle stamp (I am going to love that!), a black gelato, a damask stamp, a damask TCW template, a couple of blops of acrylic ink, all colors of my new distress ink,  my homemade glimmer mist, and a couple of homemade stamps. Whew!

A close up of my page, with the homemade stamps that created the "X" images. Plus, you can really see the glimmer in this shot. Oooh...ahhh.

I also made a couple of black and white backgrounds. They are the image of perfect-ish symmetry. I seem to have customized my damask template by bending a couple of parts, making the page like a wallpaper/Rorschach test combo. Still, I like it...and the imperfect houndstooth. That one just makes me happy...and a little dizzy.

I love the chicken wire template. The small size makes the part that makes this design look like wire very subtle, so it looks like honeycomb. Very cool!

The houndstooth of hell! I guess i went a little heavy in spots.

My Rorschach sheet, I mean damask. Even though it is very girly, damask really appeals to me.

This weekend, I will be winding down my dvd project and moving my dvd tower to its rightful place, as an organizer for my art supplies. I will put the dvds in storage and finish my organization so I have room to work. Then, I will iron those paper bags and trim them, and lovingly craft them into a couple of fabulous art journals. Who am I kidding? I am pretty sure I will finish the dvd project. I will probably get absorbed in YouTube videos and/or some of the movies I have downloaded, since I haven't watched them in years, but the rest is probably not going to happen. It doesn't hurt to aim high...

Monday, January 7, 2013

Stencil mania continues and gelatin printing is AWESOME!


I had quite the busy weekend making a mess and cutting stuff up. I am apparently on a mission to make a massive stencil/mask library because I did several this weekend. I also ruined a couple by trying to reinforce them with glue thinned with water. Whatever you do, if you make stencils out of paper of whatever thickness, water is not your friend. Just let them degrade as they naturally will over time or reinforce with take. No watered down anything!

My small disaster led me to remake one of the masks using a transparency because it was awesome enough to have a permanent-ish version.  That mask and one other I made today are my own versions of some stencil masks I have seen online that I thought were pretty cool. I also made some garden variety stencils, which I am not including in this post, since it will be so image heavy.

I made a stencil of a mouth, then added to it to make this image. I am so happy with the result! I thought for sure the teeth would come out looking like this person needed braces badly.


Yesterday, I got a wild hair and decided I needed to try gelatin printing. I had a bunch of unflavored gelatin when I fooled myself into thinking I was going to make marshmallows from scratch. That was 2 years ago. I probably will make marshmallows some day, just no time soon, so might as well use what I have, right? I found out you can cut up the gelatin, heat in the microwave until melted, and pour into the tray again. I was fearing it would be a one off, so my reason not to play with my Jell-o was removed. The recipe is this:

2 packets of gelatin per cup of water
a drop of tea tree oil, bleach, vinegar, or other anti-mold agent

You will want to use a container that is rectangular, with deep sides. At least as deep as a cookie sheet. I used a covered rectangular Pyrex baking pan, kind of like a lasagna pan only half the size. It was roughly 8"x10."  When it is in the fridge, you want it to stay covered, so I thought a container with a lid would be better than plastic wrap, since that can leave indentations. You will want to pour water in the vessel of your choice, cup by cup, to check how much gelatin you will need. You want the gelatin plate to be between 1/2" and 3/4." My container used 4 cups, so I needed 8 packets of gelatin.  You want to bloom the gelatin in cold water first. That means you will sprinkle the gelatin in part of the water you will be using, mixing, and letting it absorb water while the rest of the water you need comes to a boil. I kept seeing 1 1/2 cups of cold water in all the recipes I found. I used 2 cups and it didn't seem to affect the outcome. If you add the gelatin to hot water, it will clump and will affect your prints. When the water comes to a boil, add the remaining water to your mixture, along with the optional anti-mold agent of your choice, and stir well until everything is completely dissolved. Carefully pour this into your pan, then skim off bubbles with a piece of paper. A torn sheet of newspaper was what everyone else used, but I don't have any.  I had luck with a section I tore off an unwanted catalog. Carefully, place tray in fridge, or leave on counter if it is cool and you have the space, until gelatin is quite firm. I will wait until the next day next time. It did pretty well after 5-6 hours, but I cracked the plate when taking it out of the pan.  I am hoping that extra time will reduce the chances.

That leads me to the final step, taking the gelatin plate out of the mold. You have to be very careful. You actually don't have to remove it at all, but you should if you plan on ever using the container for food again. Ideally, the pan would be one you will not use again, but I think I am safe with the glass and thoroughly washing the plate before putting it back in the pan.  I will eventually purchase another one and this container will be craft specific.

Rather than trying to explain how to prepare to print, in my long winded, confusing way, I am going to refer you to a great instructional video on YouTube by Linda Germain.  She has a bunch of great videos on gelatin printing on her channel.  As for the printing itself, the best video I have seen is one by the incomparable Christy Sobolewski. Gelatin printing and printing with the Gelli Arts printing plate is exactly the same. A gelatin plate is just more delicate and prone to cracking. It is also not meant to be used long term, although I have read boards where people have been using the same one for several weeks. But compared to the other videos I have seen, Christy had the best results.  

One thing to remember is to never, never, ever dispose of your gelatin in the sink, even if you have a food processor. It can act like cement and cause a world of trouble for your pipes. And now for the fun part, my results. For being my first time, most came out pretty neat. I had long paper, so what you will see is my trying to contain the design to one side, for the most part. I will probably fold many of these sheets in half and make a journal from them. I was amazed at how some of the prints you disliked the most can become your favorites when it is printed over repeatedly.

This was my favorite. It began as the one I liked least.


Saturday, January 5, 2013

Homemade stencils, part 2

I had another go at a couple of the stencils I made. I stenciled black paint on my mat with the stencil slightly offset from the original. The leaf pattern wasn't much to write home about. It was neat, but offsetting it didn't do anything for it. Now, my nerve cell-looking stencil, that was awesome. So, I decided to play with it further, with Inktense pencils, white paint pen, and a technical pen.  I think I am done.


I make another stencil traced from another sketch I did years ago, this time of a woman's face. Unfortunately, I did the stenciling of the leaves somewhat over her image, but you see enough to get the point. I think it turned out pretty well, too.

I think I have a ways to go before I am all stenciled out.  It has been a distraction this week, but I plan to get back to my journal this weekend.

Friday, January 4, 2013

Adventures with a dying self healing cutting mat

Today, I spent a lot of time cutting two very elaborate mask/stencils out of transparency sheets. I learned one important thing about me I need to change. I press super hard with the craft knife, way harder than I should. I caught myself several times, but not enough to keep my hand from cramping up. I also reminded myself how badly I need to get a new larger sized cutting mat. It is now more of a self destructing, rather than self healing mat. You can barely see the lines in the center and there is this nasty dust that is crumbling off of it. I guess it is one more thing I need to purchase when I am in a job again. I am also coveting the Gelli printing plate, but I can do the same thing with gelatin for now.

So, back to the mask/stencils. The one at the far right is similar to one Christy Sobolewski of Art Geeks did in this video. If you have never heard of her, or of Art Geeks, I highly recommend taking a look at Christy's channel, as well as Rhomany's on YouTube. The videos are long, but they are highly informative and inspiring. I only just subscribed and become a member of Art Geeks, so I haven't yet become active in the community or started any of their journal prompts officially, although I guess that I guess that is not entirely true, since their last mid-week prompt was making your own stencils. Ha! I am looking forward to when they officially start their Sunday/Wednesday prompt thing again. But back to the stencils, this is my "Christy wannabe" mask. I made it out of a piece of junk mail.


The one in the center, of leaves is one I have seen all over YouTube, so I found a good image of it, printed it, and copied it onto transparency with a Sharpie, so I could recreate it. I would SO rather purchase it, but I dropped a whole bunch of money I shouldn't have been spending at all on art supplies. It is relatively inexpensive, but I cannot seem to find it in the states. I am interested in a bunch of the products in that line, so when I  am in the proper financial situation, I will purchase a bunch and show them off to you then.


The one on the left is my absolute favorite.  I traced it from an old sketchbook. It is one of my all time favorite sketches. It reminds me of nerve cells. I made a neat painting with dimensional fabric paint of it that ended up going to a friend when I moved, but it didn't really capture my sketch properly. I have high hopes for the mask.
These were sprayed with strong coffee. It is a fine start to a new splatter sheet.

I, of course, made some mistakes along the way, a/k/a things others can learn from.
  • I already said this, but it bears repeating: Do not press hard if you would like to use that hand again. Tendonitis is awful. I had a bad case of it as a file clerk at my last job that took 2 or so months to work itself out.  Cut enough stencils with a death grip and you will share that fate.
  • I would have preferred that I used paint on my first practice run. I plan to use it on my second run and let it dry on the stencil, to help strengthen it. I won't do that every time, however. I think these two designs had so many thin areas that they could use a little reinforcement. 
  • Speaking of reinforcement. Rhomany made a great suggestion, which I ignored in my haste. If you make your stencils (or stamps) out of cardboard, brush with watered down glue to seal them and extend their life.
  • I would advise using a newer, much sharper blade/better mat than mine for small curves. That was where I had the most difficulty. I am not sure which was the biggest problem. I suspect it was the mat, since I changed the blade before beginning this project.
  • Above all, be careful when you are cutting out the designs. No, I did not hurt myself this time. I snagged a couple of spots on the leaves. I lost one detail altogether and another thin area was torn when I yanked on the cut piece to remove it. Be delicate and twist them off gently, using your blade to help you along, if necessary. This is especially important when you have a lace like or intricate design.
I hope you play along and make your own stencils. I plan to make many, many more, of my own design in the near future. I have even entertained the idea of making it a challenge, like 1 stencil a day for a month. Maybe in the near future I will do that. Stay tuned.

And here are a couple of bonus photos of my cat, Sid Vicious, enjoying a rare sunny, winter day in Seattle.

Too stealthy for the paparazzi. I have a hard time capturing something this close without him moving.

The whites are all blown out, but it gives a great impression of the brightness of the sun coming in. Plus , you can see his cute little pink toe pads!

Tuesday, December 18, 2012

Stencils and Foil Beads

 My Versa Tool came in the mail yesterday! Today I played with it and created 2 stencils. It was very easy.  I traced an image on a sheet of transparency film using a fine tipped Sharpie. Once my Versa Tool (basically, a woodcutter with several interchangeable tips) heated up,  I cut lines into the plastic, being careful to skip occasionally so my design didn't fall apart. I decided to wing it rather than plan my stencils out. That probably wasn't the best idea, but it seemed to work anyway. The tip I used was a little on the the thin side, so I am going to retrace my lines using a thicker tip. I have seen many people advice people to use a sheet of tempered glass to cut a stencil out this way, but I used an old sheet of book board because it was what I had. It worked pretty well, although I am putting the tempered glass on my wish list. I like that it isn't completely crisp and straight. The lines are a little shaky, which gives it more of a homemade look.

Another thing to remember is to NEVER, NEVER EVER lose sight of the fact this is a raging hot tool. I was careful to keep it in its stand, but in a moment of foolishness, I grabbed it by the end to move. Argh! Not my finest moment. So far, this is the least unpleasant burn I have ever had on my fingertips. I made a German pancake a few years back and forgot that the pan had been in the over and the handle was blazing. That was agony. I will have a nasty scar on my thumb, but I will be okay. Let that be a lesson to you all. 

I also made some aluminum foil beads, idea courtesy of Jennibellie, of course. Her sheets of aluminum foil were painted on both sides with acrylic paint, leaving some of the foil unpainted. Then, she cut into strips and squished them tightly into balls, pierced a hole with a toothpick, then coated with a mixture of PVA glue and varnish.  She didn't like Diamond Glaze for this because of it was too thin for her liking. She is in the UK, and I don't know how similar to plain old white glue PVA glue is, but that is what I used. I mixed it with some Diamond Glaze to see how it would work. The beads are not completely dry yet, but they do not really look very glossy. I may do another coat, just with Diamond Glaze. 

 I feel I am living on the edge using Diamond Glaze because the last time I played with it, this happened.
Most of the paper beads I painstakingly cut and rolled and glazed became stuck to the toothpicks. Uncool. I keep meaning to come back with a tool and try to drill out the holes, but it doesn't sound very appealing to me. I am hoping my foil beads don't do the same.

Sadly, my experiment with the molding glitter glue into cabochons was a failure. The few that had glitter coating the bottom were somewhat salvaged by cutting the mold out. My cabochons will just include the mold. I am not sure if I will try this again. If I do, I will fill the molds with glitter and them use something harder. Maybe Diamond Glaze? Hot glue? I will also grease the molds before filling at all. I guess this is the reason we do experiments. They cannot all turn out like one hopes. What kind of experiments gone bad have you experienced? Drop me a line and we can have a laugh.